19
2011How to use filters in landscape photography part 2 – Solid NDs and the magic of the 10 stop filter!
Welcome back to the second part of my ‘How to use filters in landscape photography’ mini-tutorial.
In the first part we took a look at the graduated neutral density filter and how that was essential in being able to correctly expose an entire scene, bringing all the various light and dark areas back into the dynamic range of our camera’s sensor. If you’ve not read up on it then click the little link above (it’ll open in a new tab) and then come back here afterwards!
In this second part, we’ll take a look at the solid neutral density filter and how it can help you achieve a dramatic edge to your landscape photography… so read on!
We know that a graduated neutral density filter (or ND grad) is a piece of resin or glass which is darker at the top than it is at the bottom – this is essential to balance out the variances in brightness between the highlights in the scene and the shadows. So what is a solid ND (or simply ‘ND’) and why would we use it?
Essentially it’s a piece of resin or glass with the same neutral grey coating over its entire surface. That’s it. They come in different strengths, just like the ND grads (so 0.3/ND2/1 stop, 0.6/ND4/2 stop, 0.9/ND8/3 stop etc.) but all of the filter is coated in the same strength.
So if we use ND grads as a way of darkening a specific part of our scene in order to allow our camera to record it correctly, then why would we just want to stick a piece of dark resin or glass over our lens when all it will do is darken the entire scene. Surely it doesn’t make sense!
Well, it does really. Normally when we take photographs we’re capturing a tiny moment in time – 1/125th of a second, 1/500th of a second – miniscule measurements of time in which everything is frozen by the shutter speed.
But what if we don’t want everything frozen in time? What if we want to show some kind of movement? Take a flowing river for example – the water is constantly flowing, evolving, changing – making swirls and patterns – if you just take a normal photograph of this and essentially ‘freeze’ the water, capturing it in 1/125th of a second then sometimes it just doesn’t look right – it loses the fluidity it had and starts becoming a solid. What we need to do is imply motion in our photograph, make it reflect that the water is fluid – so how do we do it?
The key is lengthening the time the shutter is left open, so slowing down the shutter speed – taking the exposure time to half a second, a second, maybe more – recording the movement of the water over time. The problem we have is that by increasing the shutter speed we need to compensate by letting less light into the camera (by closing down the aperture) or by reducing the ISO sensitivity of our sensors. As we typically shoot close to our base ISO in daylight anyway this realistically leaves our aperture as the remaining method of balancing the increase in the shutter speed.
But as we go slower with the shutter, and as we go smaller with our aperture we get to a point where the aperture cannot close down any further – and besides we may not want to close our aperture down (for artistic reasons, to avoid diffraction, or because we’ve not cleaned our sensors recently and shooting at such small apertures will show that up on our photos!) – so now what can we do? If we keep lengthening the shutter speed then we’ll just end up overexposing our photograph.
Well, I’m sure you’ve managed to work it out by now – we use our solid ND’s! These give us a simple method of keeping our aperture at a level we want, but the darkness ends up lengthening our shutter speeds allowing us to record movement in our photographs over a longer period of time – fantastic! All we need to do is slide our filter over our lens and adjust our shutter speed to compensate – as the only job of the filter is to be dark then we’re not changing any colours in the scene, just taking it over a longer period of time.
So again, how do we know which strength we want to use. Again, this is trial and error, and down to your artistic preferences. As you progress you’ll learn how these filters work for you and how little or much filtration you need to get the results you want. For the more scientifically minded of you, each stop reduction in light that the filter gives you needs to be compensated by an extra stop of shutter speed. So, if you were using a 1 stop ND filter and the correct shutter speed without a filter was 1/125th then the correct shutter speed with the filter would be 1/60th. If you used a 2 stop filter then the shutter speed would go from 1/125th to 1/30th. With a 3 stop filter it would go from 1/125th to 1/15th. We’re not talking about massive differences in shutter speed, but enough to make a significant change in the shots we’re taking.
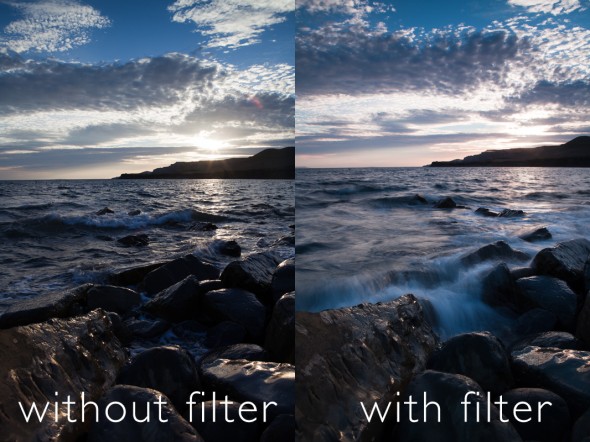
Look at the image below. The left image was taken with a shutter speed of 1/25th of a second. A solid ND was added and the shutter speed lengthened to half a second. The movement of the sea has changed from almost static to showing motion.
Most filter manufacturers (see part one of this guide for a brief overview of the manufacturers) offer holders which can take multiple filters, allowing you to stack more than one together in order to either increase the strength of the ND effect, or so you can use a grad for the sky and an ND to increase the exposure overall – the creative opportunities are endless.
So now you know about 1, 2 and 3 stop solid ND filters and how they can help you show movement in your photographs by lengthening the exposure – so why don’t we take this to extremes by introducing the 10 stop filter!
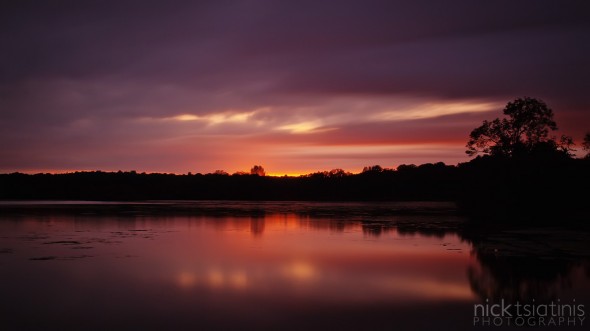
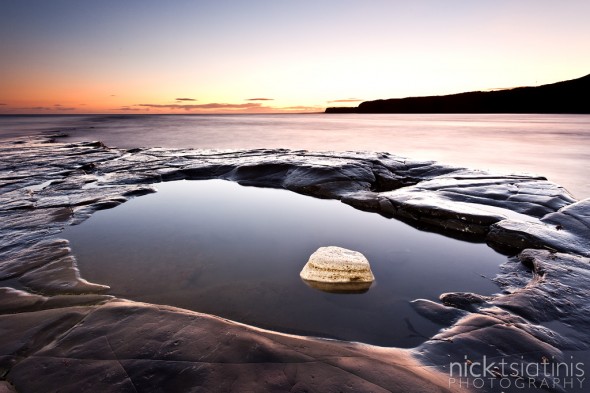
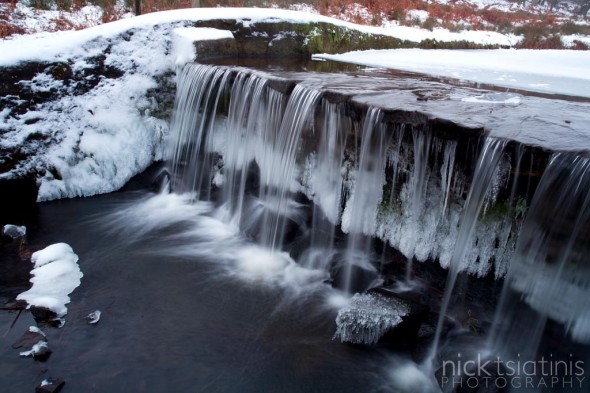
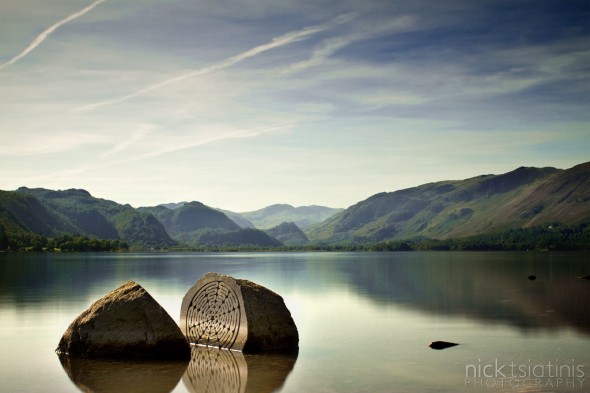
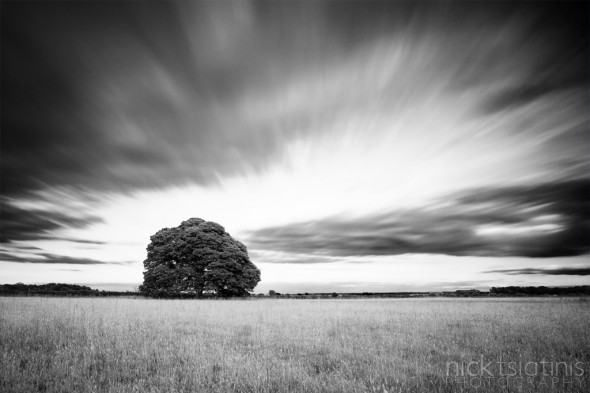
The 10 stop filter is a magical bit of glass – essentially it’s just a REALLY dark solid ND, but it’s so dark that you can’t see through it when you try and look through, and it’s almost impossible for your camera to focus through it. However it is absolute magic and allows you to take exposures into durations of 30 seconds and more in bright midday sun and for minutes at dusk. This filter flattens moving water, giving it an ethereal effect, and with exposures of 30 seconds and above, people and objects moving through your photo whilst taking the exposure don’t even appear on it. It’s my favourite filter and can’t recommend it enough. Brands such as the B+W ND110 (which I love, but don’t recommend as you have to screw it onto your lens, making it hard work using ND grads with it) and the Lee Big Stopper are the two popular makes, but other filters from manufacturers such as Hi-Tech are available.
So if the filter is so dark that you can’t see through it, then how do you compose your image? Quite simple – set your photo up without the filter on, work out the ‘correct’ exposure without a filter, then slide in your 10 stopper and recalculate the shutter speed for the difference made by the filter. To help you do this there are apps available for most popular mobile phones (I use NDCalc for my iPhone). Remember to put your lens in manual focus mode after putting your 10 stopper on otherwise the camera will try and autofocus, and most likely fail, meaning you have to take your filter off and try again!
Like the lesser strength ND filters, the extreme ND can be stacked with ND grads allowing you to control the sky as well as the overall exposure.
Error: Contact form not found.
Thanks for reading, and I’ll see you again in another tutorial soon!



Paul Mills
As ever Nick, a really well put together tutorial post. Very informative and backed up by your stunning examples.
Justin Thompson
Fantastic blog post Nick, very informative! £25 for a 2 hour tutorial sounds like a steal!
How to use filters in landscape photography part 1 – Dynamic range and ND grads.
[…] Shop « Landscape photography and the art of timing – Kimmeridge… How to use filters in landscape photography part 2 – Solid ND’s and the magic of the 10 stop… […]